
There will be no one who does not love a shiny and beautiful smile. Lip gloss recipe guide can add an extra spark to your lips and make your smile a lot brighter. But do you know that you can make your own lip gloss at home? Yes, it is possible and even easier than you think. And it is fun too.
You can see the DIY lip gloss guide in this guide. You will learn how to create your own lip gloss with the use of natural ingredients. After reading this guide, you can customize your lip gloss with your favourite colour, flavour, and shine. This is cost-effective and is also chemical-free. This DIY lip gloss guide can help you become unique out of all. So, get ready to shine bright and make your perfect lip gloss.
Table of Contents
Benefits of Homemade lip gloss:
Customization
Making your own lip gloss will give you all your control over the ingredients. The final result is what you make of it. You don’t have to adjust for anything less. You can customize your requirements for colour, texture, shade, and flavour. You can get a light pink shade with the add-on of vanilla. Or you can get deep red and also a mint twist. The ball is now in your court.
Natural ingredients
Natural ingredients are always safe. You will not find any harmful chemicals. As you are the maker of your lip gloss, you know the ingredients you have put in. If you are not sure, you can do your research online about those ingredients to learn more about them.
Inexpensive
Making your own lip gloss is much less expensive than you buy in the store. Moreover, you already have the ingredients for it at your home. It is also cheaper than buying online. You can get those ingredients in the store easily. So, get a jar of this lip gloss for your money to go to a far better place.
Easy to do
Making a lip gloss is very easy and fun. Anyone can make it at home without the use of any other equipment. The only requirement is few minutes to make the lip gloss and then it is done. Anyone can do it in less than 30 minutes and that is pretty fun. It is an awesome activity to do with your friends and family.
Essential Ingredients for Lip Gloss
Base ingredients
Beeswax
This provides structure and it makes the gloss thicker. It also prevents the gloss from melting.
Shea Butter
This will add to the moisture and also softness of your lips. It also gives shine to your lips.
Coconut Oil
Coconut oil gives shine and hydration to the lips. It is light in weight and absorbs well.
Colorants
Beetroot powder
Beetroot powder can be used as a reddish pink base to add color to your gloss.
Mica powder
This is an excellent color and texture base which is a must have for lip gloss. You can get pink, black, blue, and green mica powder.
Food grade pigments
They are is easy to work. You can mix and use them easily. You can use this pigment for lipsticks and also for eyeshadows.
Cocoa powder
Cocoa powder gives brown and dark brown shade to the lip gloss. And this is also useful for your skin.
Flavors and scent
Essential oils
Lavender and peppermint are two of the best essential oils for the lip gloss. They have a strong flavour and provide a cool sensation.
Vanilla extract
The smell of vanilla extract is comforting. It also adds a sweet taste.
Natural flavorings
Fruit flavourings like orange, lemon and other fruits are also good to add to the lip gloss.
Additives for Extra Shine
Vitamin E Oil
Acts as an antioxidant and extends the shelf life of your lip gloss.
Castor Oil
Adds a glossy finish and helps with the smooth application.
Cosmetic-Grade Glitter
Provides a fun, sparkly effect.
Basic Lip Gloss Recipe
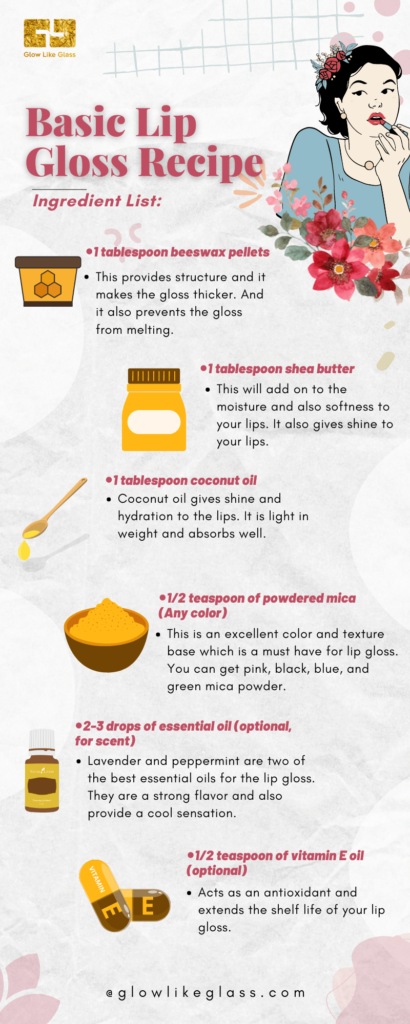
Ingredient List:
- 1 tablespoon beeswax pellets
- 1 tablespoon coconut oil
- 1 tablespoon shea butter
- 1/2 teaspoon of powdered mica (Any color)
- 2-3 drops of essential oil (optional for scent)
- 1/2 teaspoon of vitamin E oil (optional)
Workspace preparation:
Get all the tools and ingredients together. You need a boiler, a mixing bowl, a spoon and small containers to store the lip gloss.
Melt the base ingredients:
First, measure out the beeswax and put it in the bowl. If you are using a flavour, measure it out and place it in the bowl. Turn the stove on. Bring the water to a boil. Make sure that there is a gap between the bowl and the water. Let the beeswax and the other ingredients melt. Check every now and then to make sure that the ingredients are melting.
Add color and scent:
Add butter and oil when the mixture is melted. Then start stirring. Once it is combined, turn off the stove and remove the bowl. Stir in the mica powder to the mixture. Do this until you got your desired color. If you want a dark shade, you can add more.
Pour into containers:
Once it is done, pour it into your lip gloss container. You have to pour when it is in liquid state itself. Allow it to cool and solidify completely. It may take upto 30 minutes. Or sometimes an hour.
Label and decorate:
Once the lip gloss is hardened, you can label it and decorate it as you wish.
Tips for Success
Avoid Overheating
Melt the ingredients gently to avoid burning or compromising their beneficial properties.
Experiment with Ratios
Adjust the ratios of beeswax, coconut oil, and shea butter to find the perfect texture for you.
Clean Tools Immediately
Clean your tools and containers promptly after use to prevent the mixture from hardening on them.
Troubleshooting Common Issues
Gummy or Runny Gloss
Use more beeswax.
Hard Gloss
Use more coconut oil and/or shea butter.
Discolored Gloss
Stir in more mica powder to achieve your desired shade.
Grainy Texture
Strain the gloss through a sieve to remove any lumps or particles.
Too light
Remelt and add more mice powder.
Too dark
Remelt and add more base ingredients.
No scent or flavor
Remelt and add a few more drops of essential oils or flavourings.
Conclusion
Creating your own lip gloss is not only fun but also incredibly rewarding. By using natural ingredients in Lip Gloss Recipe Guide. You can avoid harmful chemicals and customize your gloss to fit your personal style perfectly. Whether you’re looking for a specific colour, a unique flavour, or an extra glossy finish, making lip gloss at home allows you to experiment and find what works best for you.
With this guide, you’ve learned the basics of a simple lip gloss recipe, how to customize it with different colours, flavours, and packaging, and how to troubleshoot common issues. Now, it’s time to put your creativity to the test and start crafting your perfect lip gloss.
Remember, the possibilities are endless, and the joy of using a product you’ve made yourself is unmatched. Share your creations with friends and family, or keep them all for yourself. Either way, your smile will shine brighter than ever!